How to get your sign installed: Install it yourself
Getting the sign on the wall or in the ground or where it needs to be can be intimidating, but we can help.
There are 2 major ways: Hire an installer or do it yourself.
Doing it yourself? Sooner or later, you will want to do the installation yourself. Maybe you have watched several installs or just get tired of scheduling and paying for an installer. It is a natural progression to do it yourself.
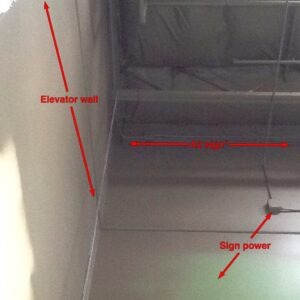
Survey: The first step is the survey. You probably have done most of this yourself already! If we focus on channel letters of a strip mall leased unit, you will have the most common sign and the most common place. These strip malls are nearly 100% channel letter signs, they are built to have channel letters. The first part of the survey is the straight on photo. Taking the picture is only the start. We need to measure the width and height of the sign area. This plays hand in hand with the site’s sign program or sign policy. Asking the property managers for this is a great first move for permitting, but it is also part of the initial survey. It will quickly tell you how big the sign can be. There are a lot of tricks to get the measurements without actually getting up there. Here are a few: Bricks and boards are a certain size. Find a feature (like a brick, cider block, or board height) on the same plane as the install site. Count the bricks – for example 32 bricks at 9” a brick is 9X32=288 inches. 288/12 is 24 feet. Cannot find this feature? Make one! Home Depot sells conduit cheaply, buy a 20 foot conduit pipe and some red tape. Use the red tape to mark out 12 inches (1 foot, 2 foot, 3, 4, 5, 6) and place the pipe on the building face – Count the marks and you are there!. If you have the height, It is no problem to use that to get the width. Next look behind the wall, you may need a ladder, you may need to remove ceiling tiles, but look for electrical, make measurements and look for problems. The wires need to come through holes in this walls, measure this wall with a tape measure. You may need to get on the roof or there may be a “Doghouse” – that is a small access space behind the site wall.

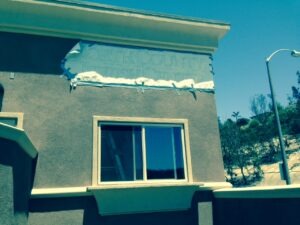
The Paper Pattern: Ask for a paper pattern, on this pattern all the holes are marked. This is key to get the spacing right, the holes all in the right places. Using ladders or a bucket truck, you will tape the paper pattern to the wall. There are a few things to look for. Check out the neighbors signs for level. You do not want your sign too low or too high compared to the other signs in the complex. It is easy to forget this and have your sign fail to match the others. A little variation is common. You also want to place the sign so the holes and wires that go through them will be easy to gather on the other side of the wall. Steel beams, double walls, areas where access is difficult all affect your sign placement. This is where your survey is key. If the back of the wall is too difficult, a raceway may be required on the outside. If there is no drop ceiling, or the area is easy to see, an inside raceway may be required.
Drill the holes: Using the paper pattern, use a hammer drill to make 2 types of holes: Mounting holes and holes for the wires to go through. Mounting holes are smaller. How are you going to mount the letters? All thread studies in GE type 2 silicon filled holes and shove it in? Or Ribbed Plastic Anchors With Screws, or deck screws? Togglers? This controls the bit size. Drill all the holes and remove the pattern. You now will have a perfect set of holes
Mount the letters: Starting by feeding the wire through the hole, and then mount each letter. In most cases the faces will be off the letters. You start to see a fast progression to your sign. Use silicon the weather seal the holes as you go. Also using a 2nd guy on the inside to pull the wires through helps.
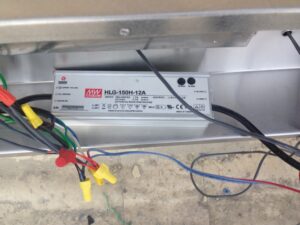
Electrical Connections: On the other side of the wall a 2nd guy helps. He can start by pulling the wire through. Once the wire is through, gather all the wires together and to the place where the Power supply will be mounted. Using wire caps, connect the positive and negative wires for each letters. This can be challenging and often positive and negative will be reversed (hint, it there is a 12VDC source and it does not light, switch the neg and pos) The bundle of wires can be too large (hint, use jumpers) and other issues can come up, but if it is done right, the open face letter will light up.
Remount the faces: Once all the lights are on, replace the faces and you are close to done. Make sure the faces are screwed in with 3 screws or more. Watch the quality of the mounting.
These are the major steps, but there are a number of other steps. Need help to walk through what an install will require? We can help you with this. There is a sense of accomplishment when you do the install.
Give us a call and let’s start 760-730-5118. We would be happy to work with you!
Signs for America (760) 730-5118